Repetitive tasks are a necessary evil. Many IT administrators rely on PowerShell scripts to automate their duties and monitor systems. Scripts can be run to complete operations in Office 365 and SharePoint Online. A script is a collection of PowerShell commands (also known as cmdlets) saved as a text file with a .ps1 extension for later use.
How does one execute a .ps1 file against their SharePoint Online tenant? That’s where SharePoint Online Management Shell comes into play.
SharePoint Online Management Shell is a Windows PowerShell module created to manage SharePoint Online.
Permissions for SharePoint Online PowerShell Management
To run SharePoint Online PowerShell commands, you must be assigned the SharePoint or global administrator role in Office 365.
Installing SharePoint Online Management Shell
There are two ways to install SharePoint Online Management Shell:
- Download SharePoint Online Management Shell from Microsoft
- Install SharePoint Online Management Shell via PowerShell
For option #2, your PC must have PowerShell 5 or newer. After opening a new PowerShell window as an administrator, you can run the following command to install SharePoint Online Management Shell:
Install-Module -Name Microsoft.Online.SharePoint.PowerShell
If you don’t have administrator privileges on your PC, you can add the Scope parameter to install the module only for the current user (you):
Install-Module -Name Microsoft.Online.SharePoint.PowerShell -Scope CurrentUser
Connecting to SharePoint Online with Powershell
Once SharePoint Online Management Shell is installed on your PC, you need to use it to connect to SharePoint Online. (Note that the commands below may already be integrated into your script.)
You can connect using one of the following commands, based on whether your tenant has multifactor authentication (MFA) enabled:
Multi-Factor Authentication Enabled
Connect-SPOService -Url https://yourtenant-admin.sharepoint.com
Without Multi-Factor Authentication Enabled
Connect-SPOService -Url https://yourtenant-admin.sharepoint.com -Credential admin(@)domain.com
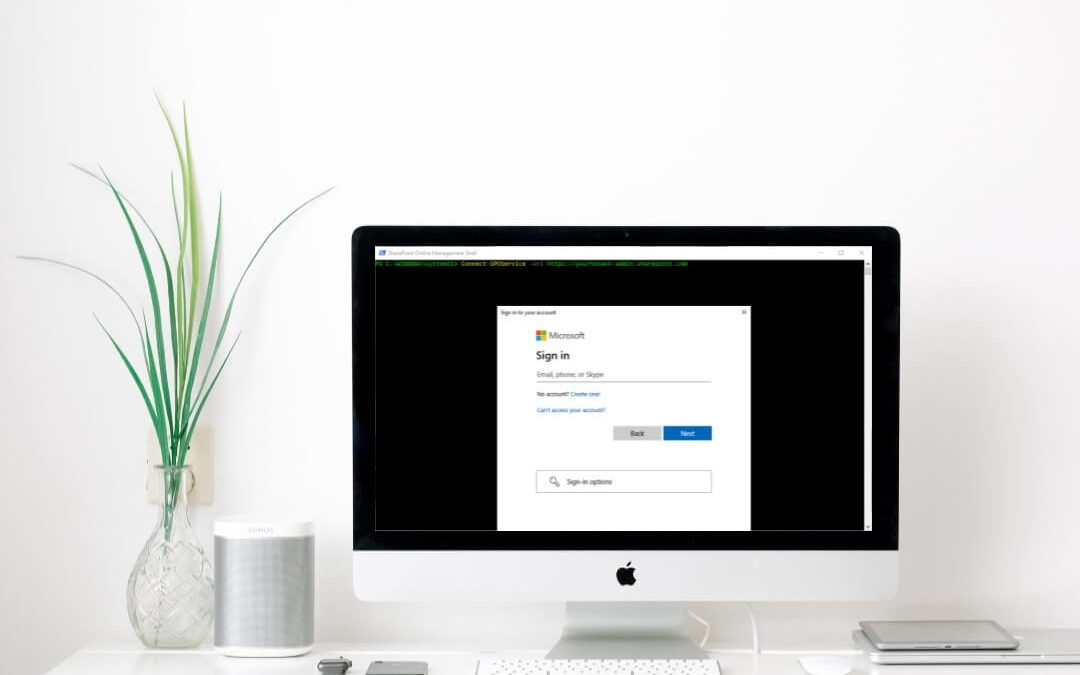
You will need to replace “yourtenant” with the URL of your Office 365 tenant and “admin(@)domain.com” with your Office 365 login. A dialog box will appear prompting you to enter your credentials.

Credential Prompt With Multi-Factor Authentication Enabled

Credential Prompt Without Multi-Factor Authentication Enabled
Once the sign-in process is complete, you’re connected to SharePoint Online and ready to run your script.
Running a .PS1 File in SharePoint Online Management Shell
Now that you’ve installed SharePoint Online Management Shell and connected to SharePoint Online, you can run your .ps1 file. To do so, type or paste the following into the PowerShell console:
& “C:ScriptPathScript.ps1”
You’ll need to replace the fake path above with your script’s actual file path, which you can copy from the address bar of Windows File Explorer if needed:
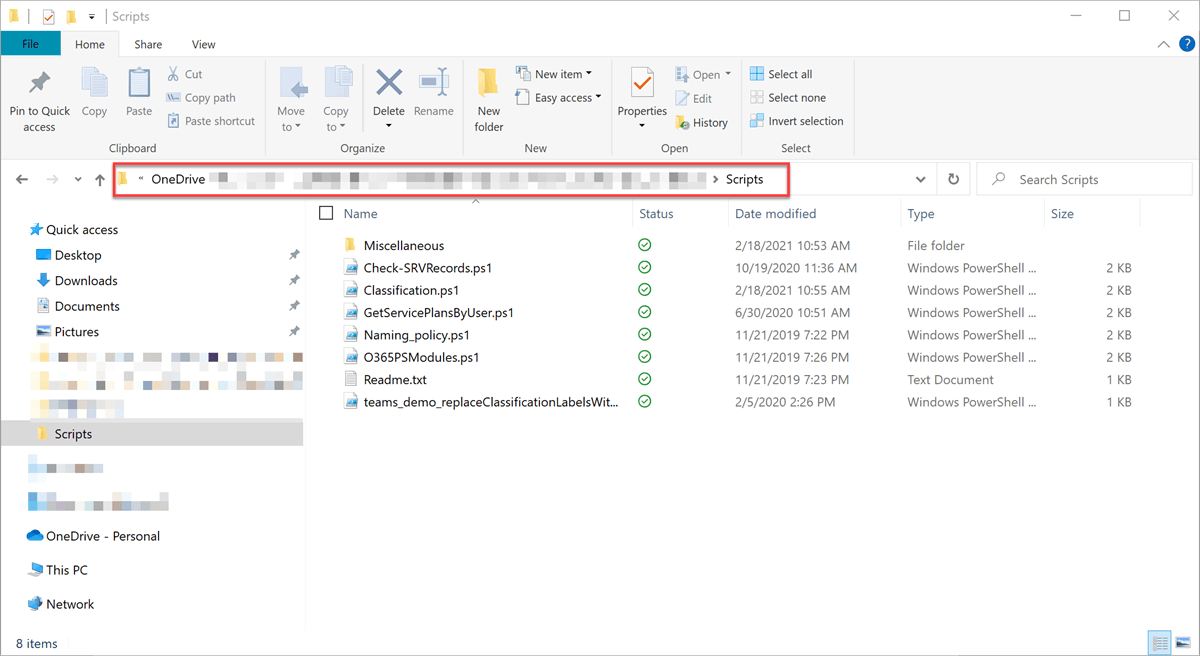
Next, hit Enter on your keyboard to run the script. That’s all there is to it!
Troubleshooting Running a .PS1 File In PowerShell
If PowerShell won’t let you run any .ps1 files, you may need to update your device’s execution policy. Execution policies are a safeguard put in place to prevent malicious scripts from running on your PC.
You can update your execution policy settings by running the following command in PowerShell:
Set-ExecutionPolicy -ExecutionPolicy RemoteSigned
Replace “RemoteSigned” with your desired execution policy. The available options are:
- Restricted – No scripts can run.
- AllSigned – Only scripts signed by a trusted publisher can run.
- RemoteSigned – Scripts downloaded from the internet must be signed by a trusted publisher to run.
- Unrestricted – All scripts can run.
If you don’t feel comfortable changing the execution policy, you can also unblock a script to run it without changing the execution policy.
What Office 365 tasks do you automate using scripts? Comment below and let us know!