As we all know, improvements to Office 365 functionality are being made so often that sometimes it’s hard to keep up with them all. Just a few weeks ago, Microsoft’s PowerApps team announced the availability of new PowerApps functionality within Office 365 for SharePoint First Release tenants.
Perhaps the most anticipated of these features that they announced is the ability to use PowerApps to customize list forms within SharePoint Online.
Now users have another “no-code” method for form customization besides InfoPath.
It’s not uncommon for users to want to “spice up” the out-of-the-box forms used in SharePoint lists with custom graphics and layout, conditional formatting, data validation, etc. With PowerApps, now all of that is possible directly from the browser.
I’ve explored this new functionality and was able to add relatively sophisticated functionality to a simple list form in a pretty short amount of time.
I started with just a simple custom list with a handful of columns. For this PowerApps tutorial, I decided to mock up a list that could be used by an organization or team to track issues.
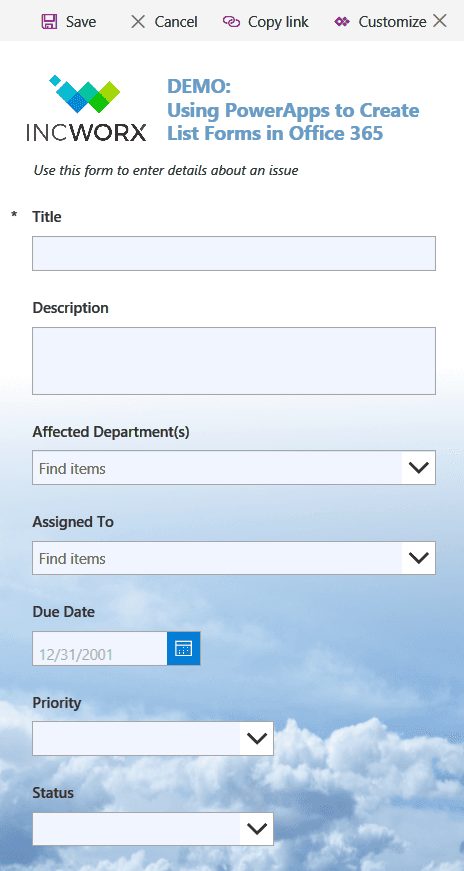
My original custom list was simply named, “Issues”
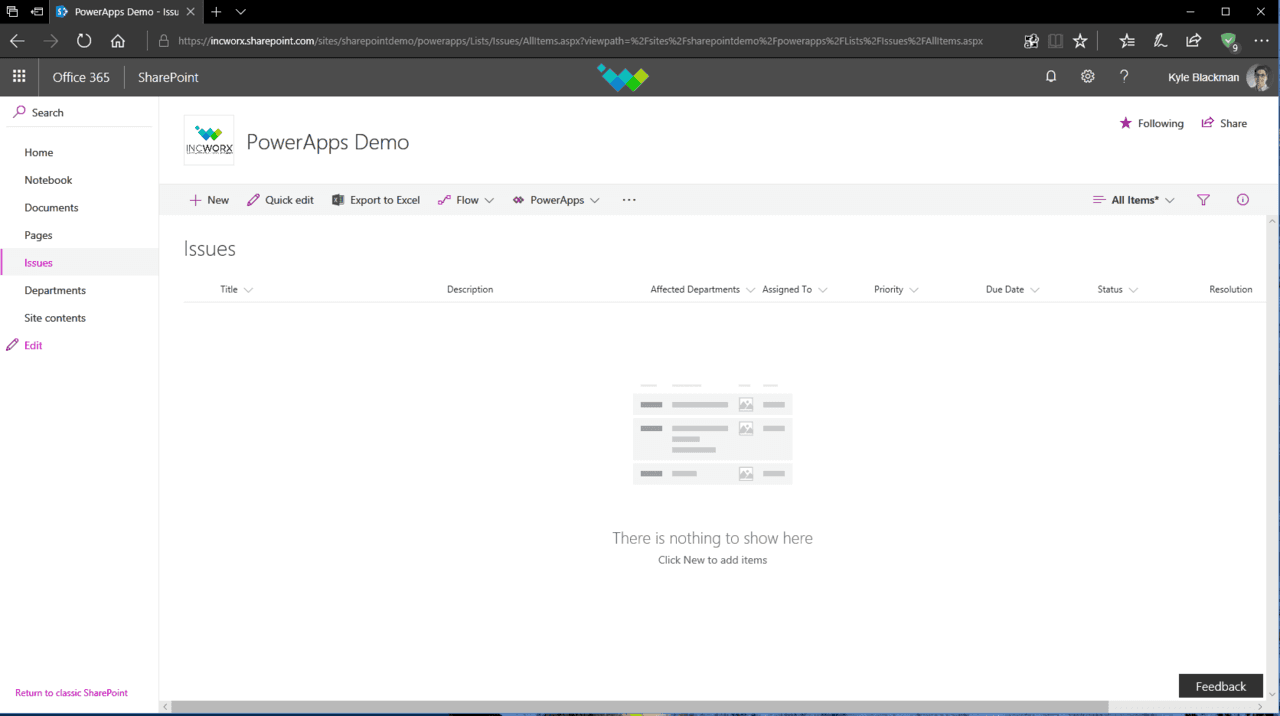
At first glance, the list looks like any typical custom list you would add to a site. However, when you click on “PowerApps” in the list view menu, you’ll see a new option to “Customize Forms.”
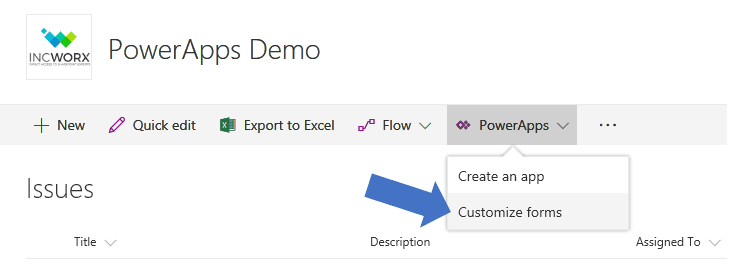
This option is the gateway to this new functionality and will open the PowerApps development interface directly within the browser. This interface provides a way to view and change the properties of each of the form’s elements with a familiar ribbon-centric menu system common to all Microsoft Office applications.
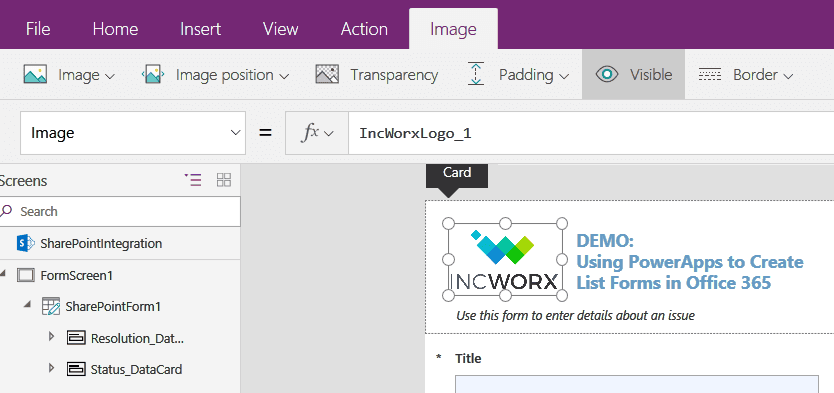
You’ll find each of the fields of the list form in “cards” that contain information about the field’s data, label, and other properties.

Feel like adding your organization’s logo to the top of the form? Simply create a new custom card at the top, and then in the Ribbon select Insert > Media > Image and browse for the logo’s image file you would like to add.
Repositioning or resizing the image is simply a matter of dragging the image and adjusting the borders or entering specific values for those properties in the menu on the right.
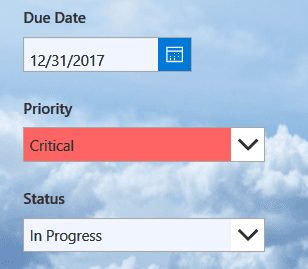
For my form, I wanted to use conditional formatting to highlight the “Priority” field in red whenever an Issue was submitted that a user designated as “Critical” priority.
To do that, I selected the “Priority” field and selected “New Rule” from the “Rules” menu on the right.
Then I could define the condition for when that field was to turn red, in this case when the text of that field equaled “Critical.”
Afterward, I defined a new action that resulted from that condition.
In this case, I changed the “Fill” and “HoverFill” properties of the field to red, specifying that color using RGBA (red/green/blue/alpha) values.
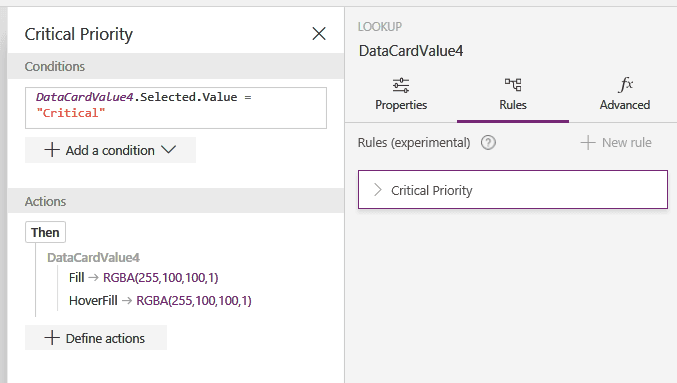
Now, whenever a user-selected “Critical” from the drop-down list of Priority choices, it displayed it in red which definitely made it stand out on the form!
This ability to customize SharePoint list forms using PowerApps is a welcome new addition to the features available in Office 365.
What I was able to create in a short amount of time was just the “tip of the iceberg” as far as possibilities go for creating slick, user-friendly forms in SharePoint.
In just a matter of hours, I was able to transform my custom list form from this…

…to this!
These forms, which are also 100% compatible on mobile devices, combined with Microsoft Flow to create automated business processes to the list data, are a great new way to provide users the ability to work smarter in SharePoint Online without having to resort to using complicated development applications.
If your business could benefit from creating custom business applications but this PowerApps tutorial wasn’t enough, you can learn more about how our PowerApps Consulting Services can help!