SharePoint is more than a document repository. It empowers users to store, collaborate on, and manipulate all types of data. This article will cover how to create a form in SharePoint for any list.
Using SharePoint lists, users can capture information such as announcements, events, tasks, and issues. That data can then be easily manipulated (sorted, filtered, and reordered) and saved in various configurations called list views.
What does this have to do with SharePoint forms, you ask?
Well, when a new list is created, a corresponding form is also generated. If you can create a list, you can make a custom form in SharePoint!
Permissions
Across all versions of SharePoint lists, users will need at least Edit permissions to create and manage lists.
When it comes to customizing SharePoint forms, permissions become murkier.
Aside from modifying forms via the out-of-the-box means outlined below, additional Microsoft and third-party tools can be used to customize SharePoint forms.
Permissions to use additional tools will depend not only on your level of access within SharePoint but also on your organization’s data governance policies regarding those specific tools.
Out of the Box SharePoint Forms Customization
Let’s learn how you can alter your custom list forms using out of the box settings for your SharePoint on-premises or SharePoint Online, in Office 365, list. [/et_pb_text]
SharePoint List Form Overview
In the example lists below, there are a few common SharePoint list column types:
- Single line of text (Title)
- Number
- Yes/No
- Person
- Date and time (Date)
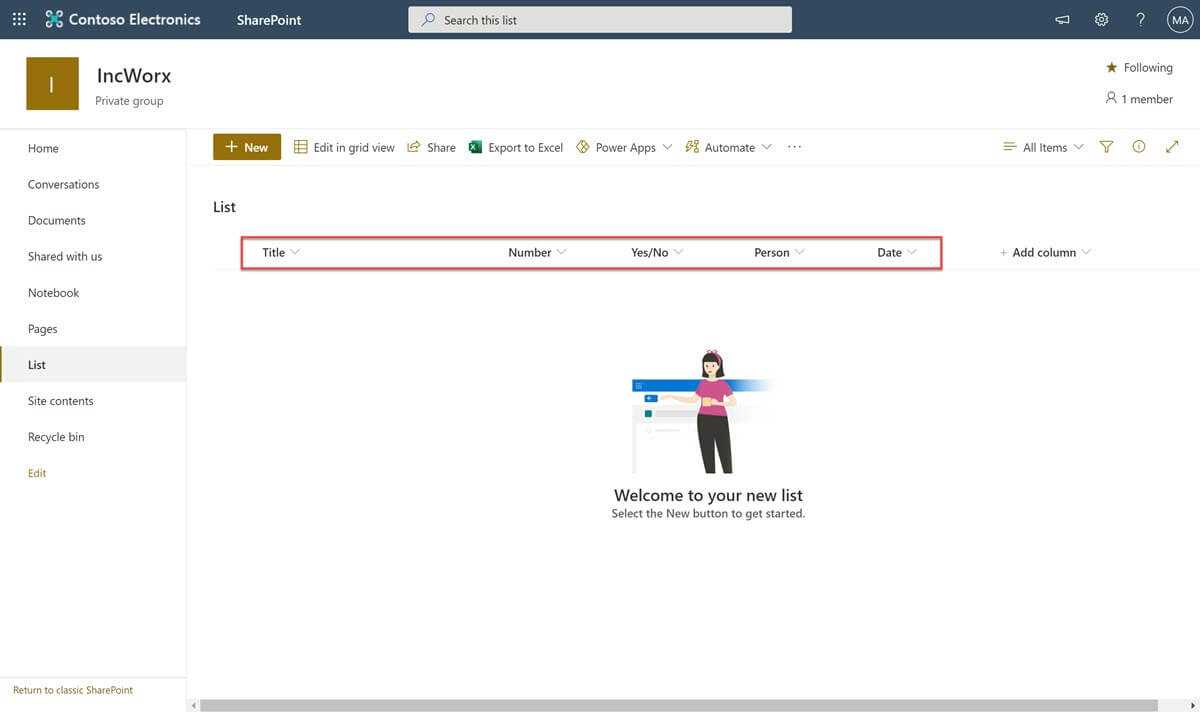
Modern Form Experience
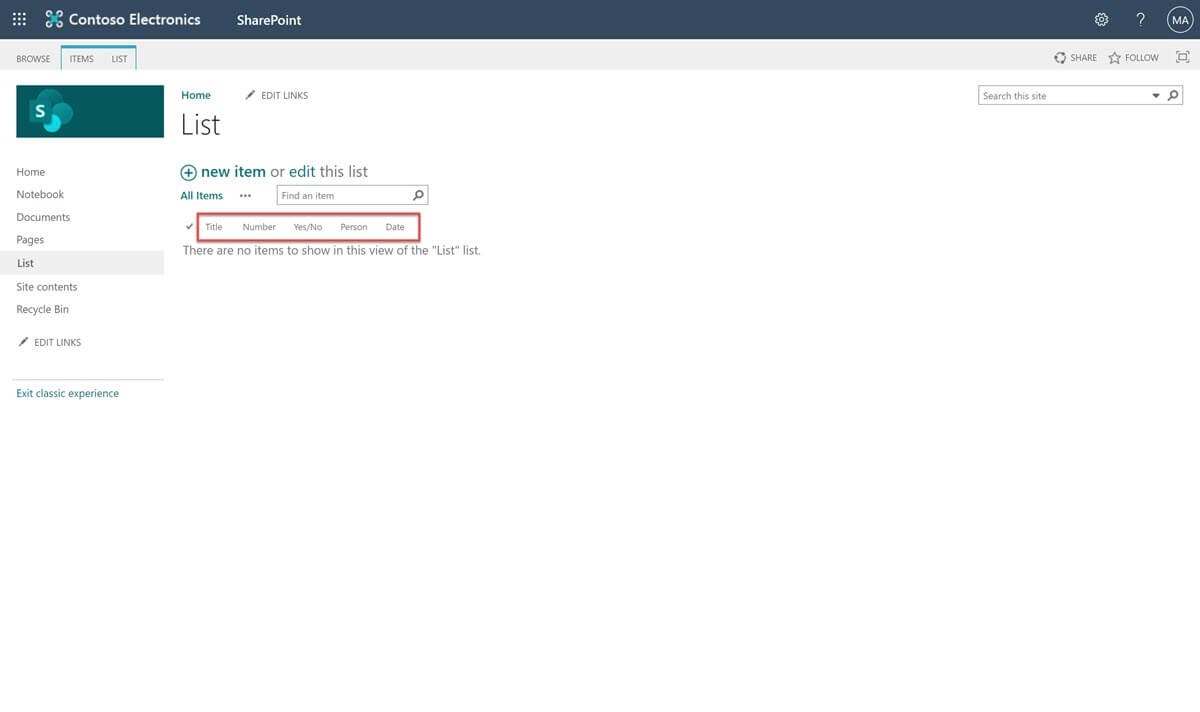
Classic Form Experience
By clicking on the + New button or + new item link in the upper left corner of the SharePoint list, you can see the default list form. When a new data column is added to the list, it is automatically added to the form.
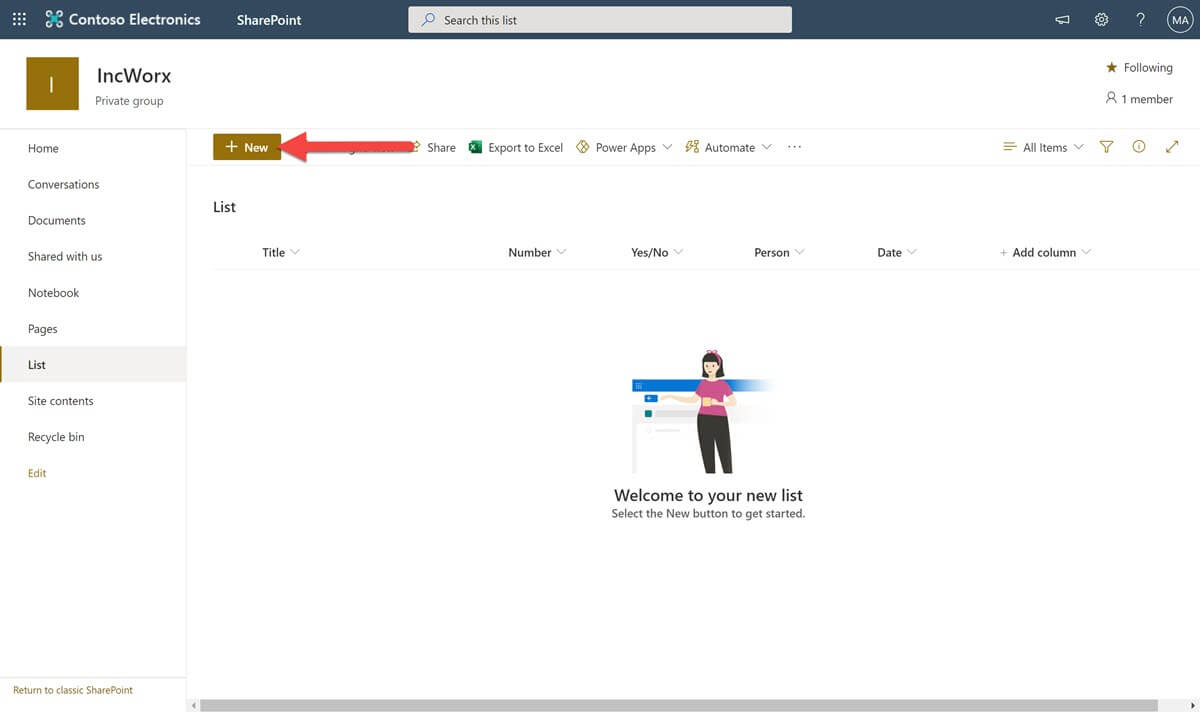
Modern Form Create New Item
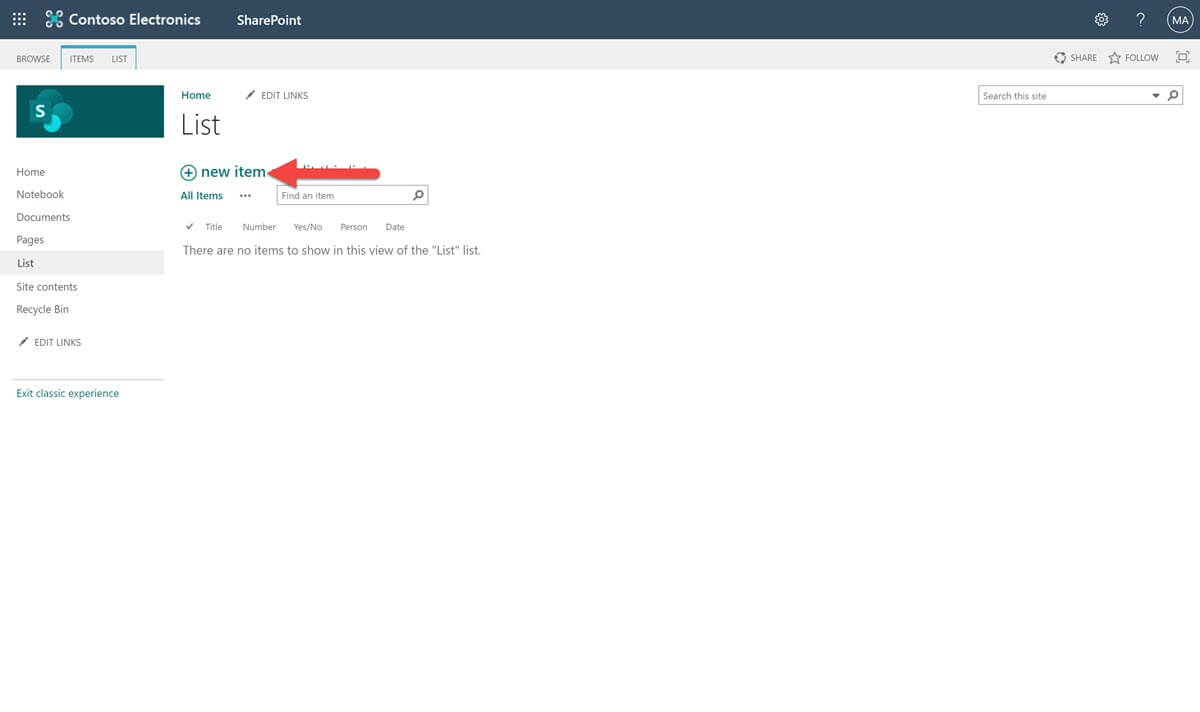
Classic Form Create New Item
After clicking the new item button, you will be presented with your new item form.
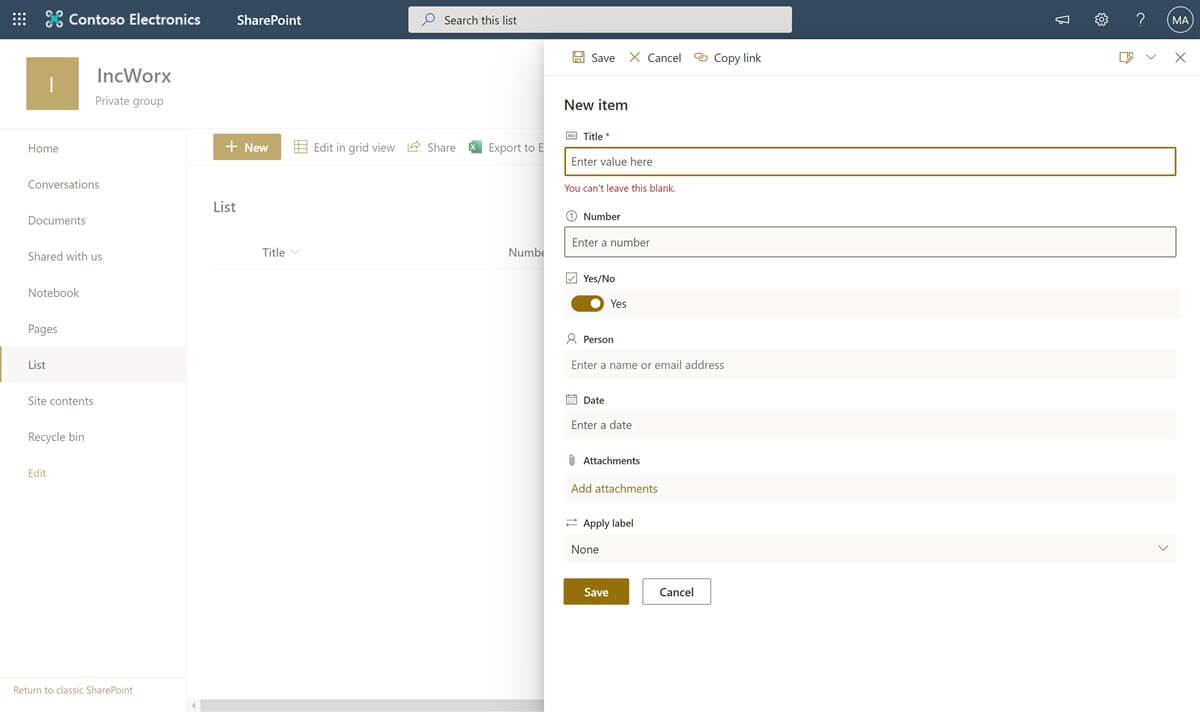
Modern New Item Form
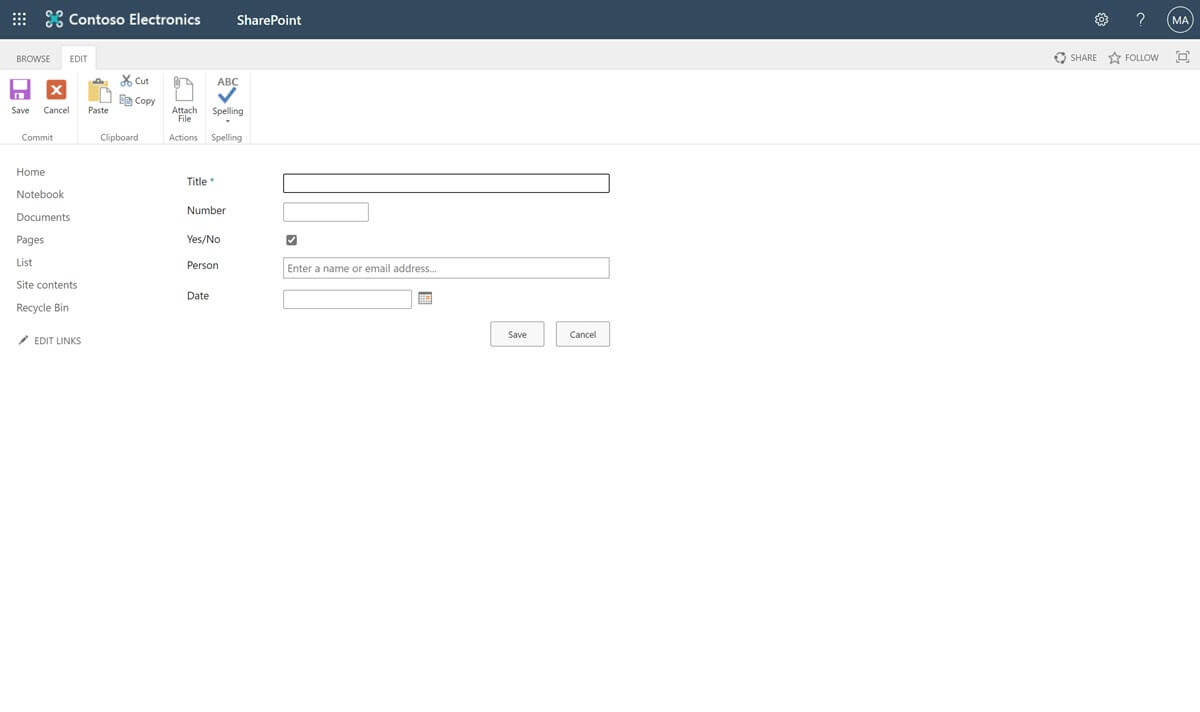
Classic New Item Form
There are a few traits worth noting about the form:
- Different data field types are represented by different controls. For example, the Yes/No field shows up as a toggle switch or checkbox, whereas the Date field displays a mini calendar popup.
- Required data fields, like Title, in this case, have an asterisk (*) beside them and display an error message if left blank. The form will not allow submission until all required fields are filled.
- The data fields are arranged based on the order they were created in the list.
How Do I Create a Custom Form in SharePoint?
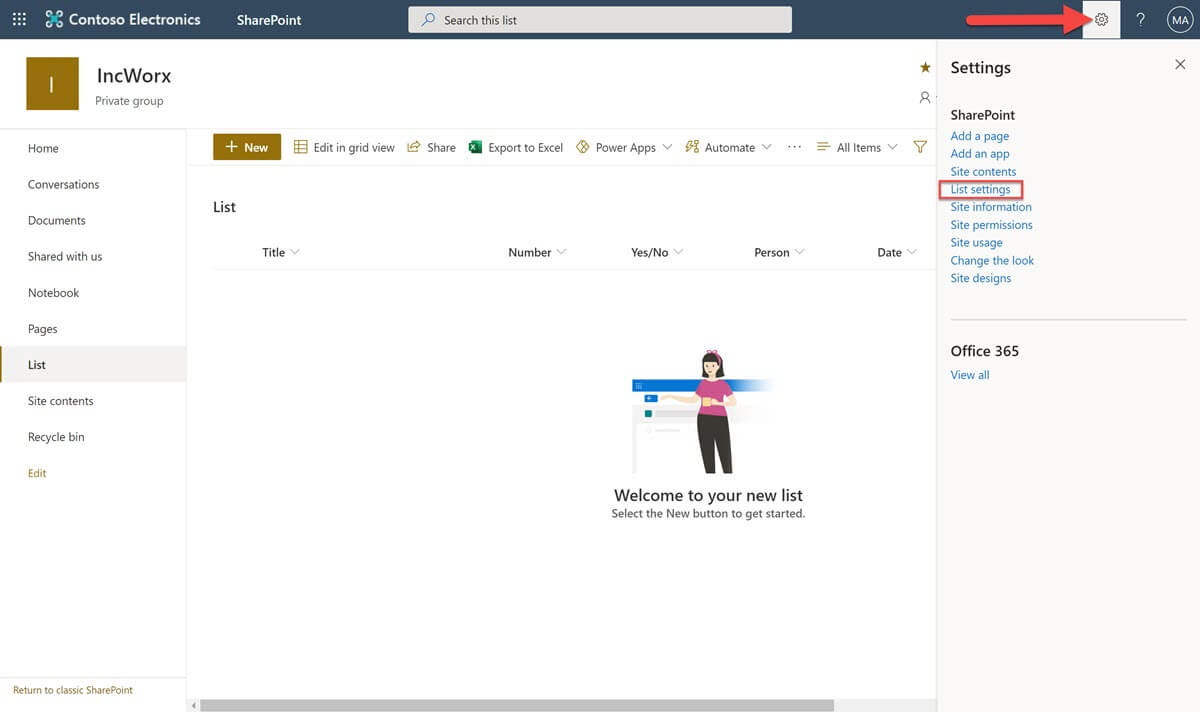
To change the look of your custom form using out-of-the-box methods, you can go to the SharePoint list settings page. Once there, you can follow these steps to get to the SharePoint list settings page:
Modern SharePoint
In the upper right corner of your screen, click on the Settings icon and select List Settings.
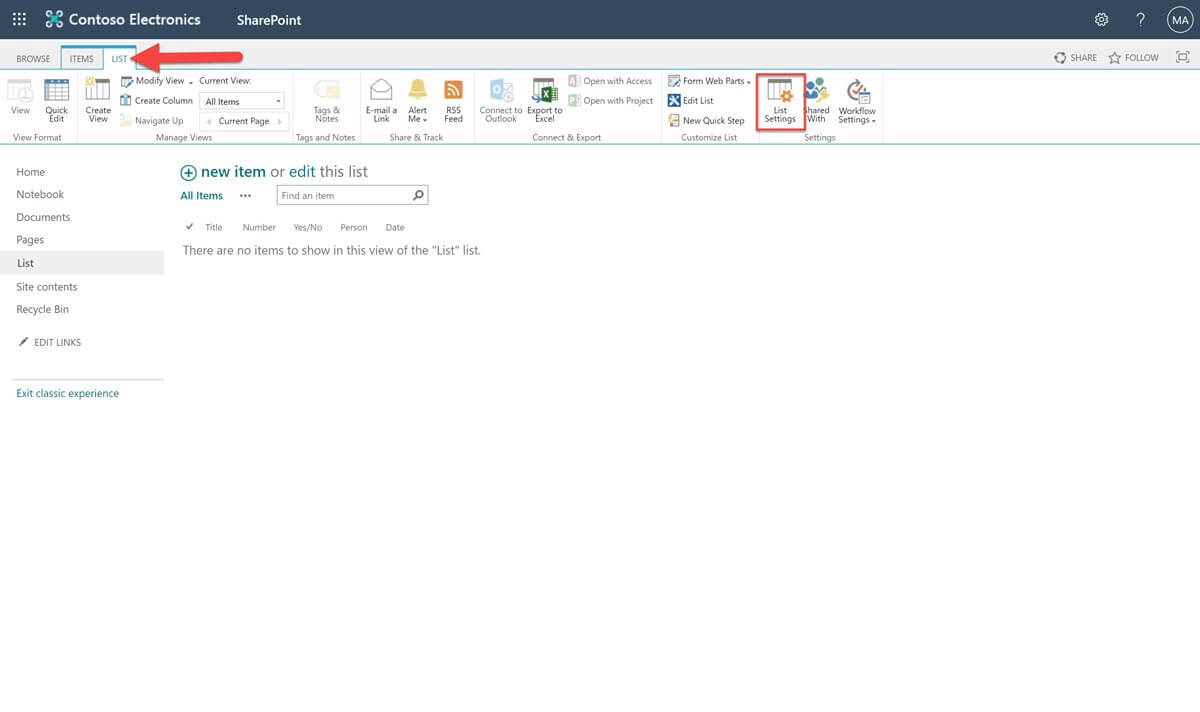
Classic SharePoint
In the ribbon, click on the List tab and select the List Settings button.
Once on the list settings page, it will look the same in both the modern and classic experiences.
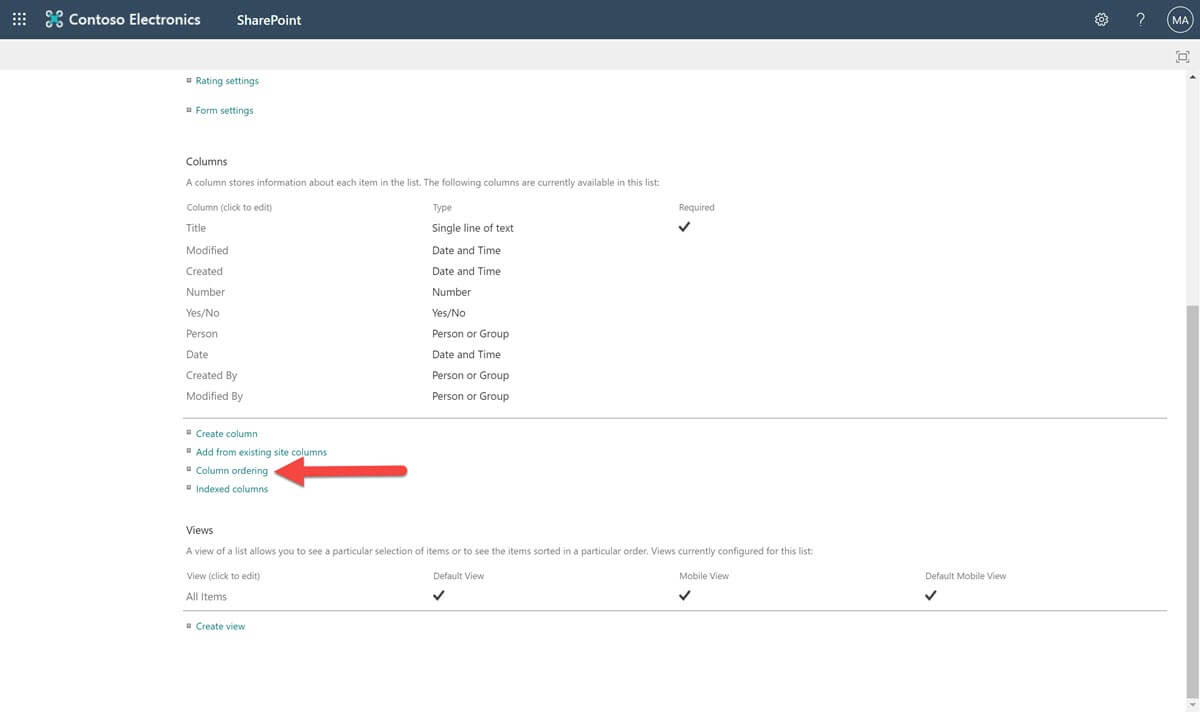
Reordering Form Fields
To reorder how the fields display on your list form, follow these steps:
On the Settings page, scroll down to the Columns section and click the Column ordering link.
Use the numbered dropdown fields to reorder the columns.
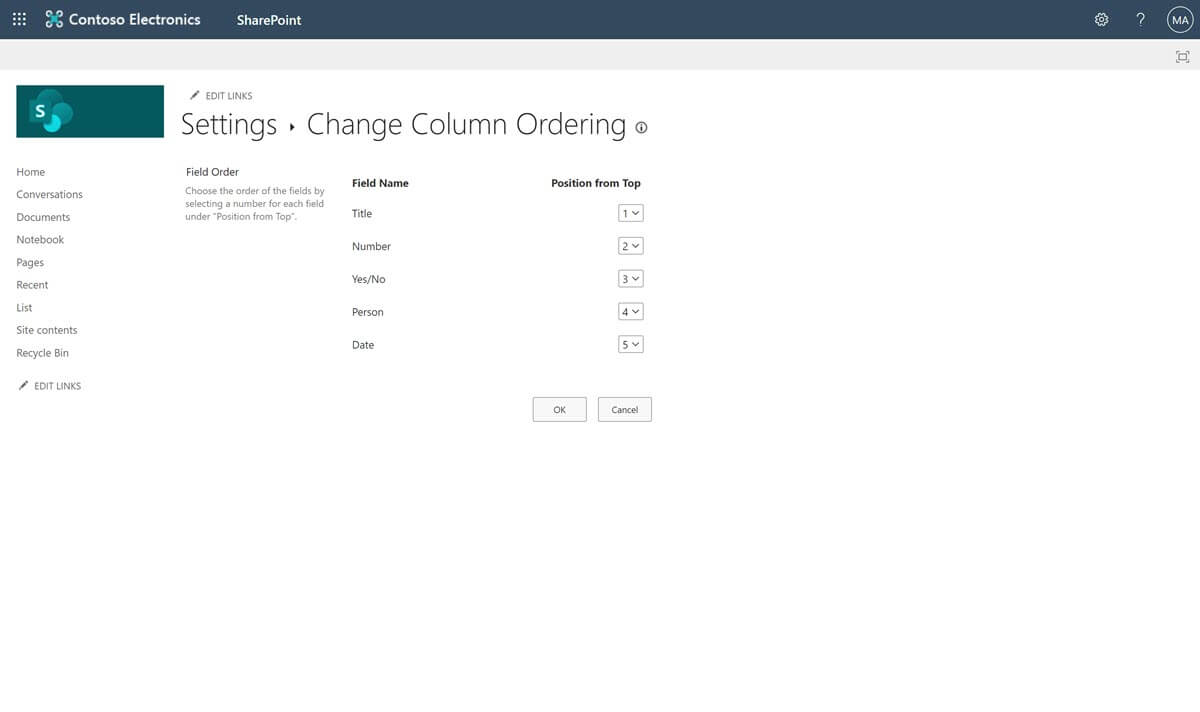
Note that the changes you make here will only change the order of the fields as they appear on the form, not their place in the list view.
Click the OK button to save your changes.
Requiring Form Fields
Marking a field as required can be done in multiple places in a SharePoint list. These steps illustrate how to do so from the list settings page:
Scroll down to the Columns section of the List Settings page and click the field you want to require on your form.
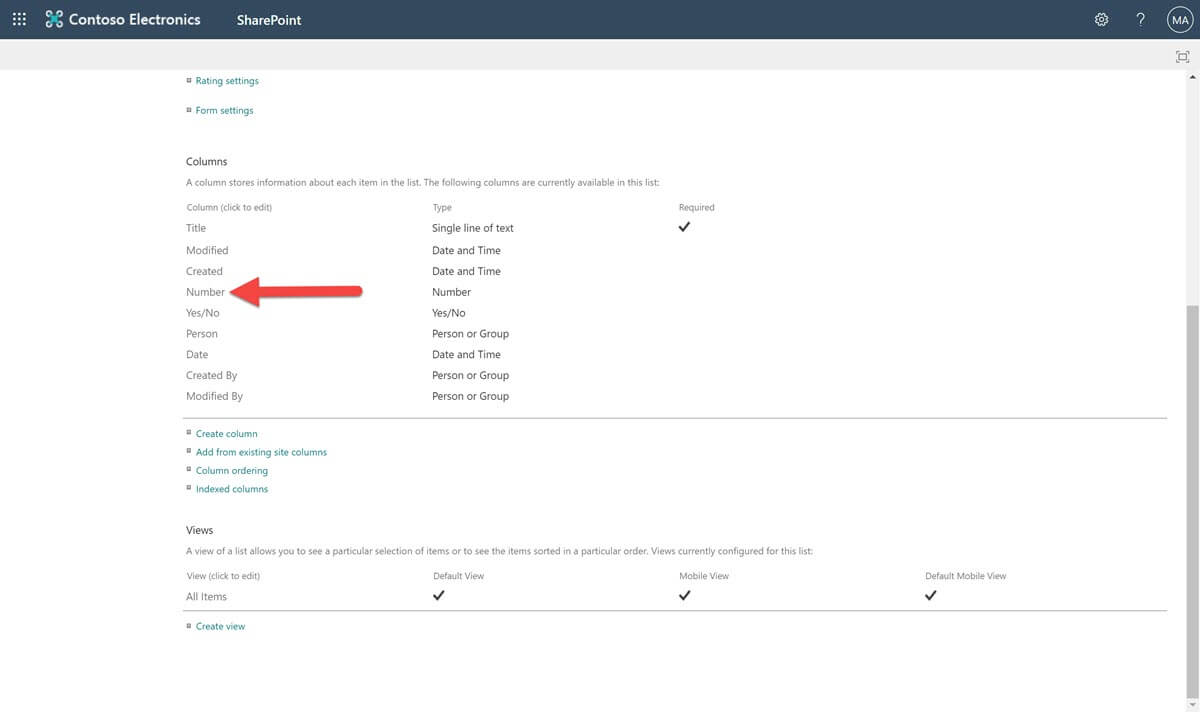
The Edit Column page will look different depending on the type of column, as there are different settings for each data type. Regardless, you should see a Require that this column contains an information option. Select the Yes radio button.
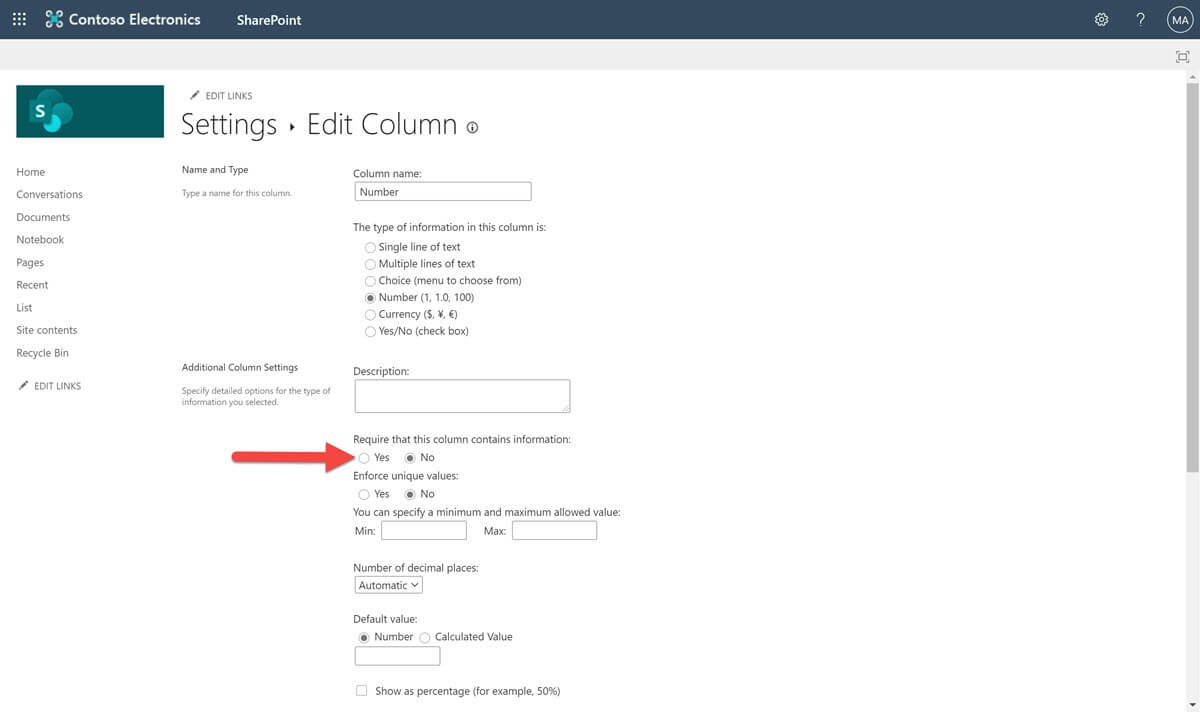
Click the OK button at the bottom of the page to save your changes.
Other Form Customization Tools
If you want to alter your custom forms beyond reordering the fields and changing their requirements, you’ll need to use another tool that integrates with SharePoint. In addition to third-party options, Microsoft has developed software that can be used for creating a custom form.
Other options for how to create a form in SharePoint include:
- Power Apps
- Microsoft Forms
- InfoPath
- SharePoint Designer
- Visual Studio
Power Apps
Microsoft Power Apps enables users to build applications without knowledge of traditional code. Luckily, Power Apps integration is built into Office 365 through modern SharePoint Online lists, enabling you to get started right away.
SharePoint 2019 can be integrated with Power Apps but not older on-premises versions.
Microsoft Forms
Users can create a form via Microsoft Forms to gather information. Unlike the other tools presented here, Microsoft Forms data will not be stored in or write back to a SharePoint list. However, it may be a good option to survey external users without enabling guest access in your environment.
Microsoft Forms can be added as a web part on modern SharePoint Online pages in Office 365.
InfoPath
Before Power Apps, there was InfoPath. InfoPath is a program that allows users to create forms that can be filled out in a web browser. Since its launch in 2003, InfoPath has extended its form customization and creation capabilities to corresponding versions of SharePoint on-premises. If you’re not already familiar with InfoPath, now isn’t the time to begin your education—that ship has sailed.
Power Apps, is marketed as “the successor to InfoPath.” For that reason, we recommend using Power Apps over InfoPath whenever possible. InfoPath 2013 is the last and final released version of InfoPath, and Microsoft is ending mainstream support for it on July 13, 2021.
SharePoint Designer
Mainstream support is also ending for SharePoint Designer 2013 on July 13, 2021. While it can be used to create and modify classic SharePoint list forms or a web part, doing so requires knowledge of traditional code.
Visual Studio
To use Visual Studio on a custom list, you need knowledge of traditional code and development experience.
Because you’re essentially building a form from scratch, the customization options are limitless. However, forms developed in Visual Studio are hard to maintain and update due to the expertise required.
Depending on your situation, using Power Apps, Microsoft Forms, or InfoPath instead of Visual Studio to manipulate SharePoint forms will save you and your organization from future headaches.
Want to Discuss How to Create a Form in SharePoint?
Still trying to wrap your brain around how to create a form in SharePoint? Are you stuck with a bunch of InfoPath forms that need to be converted to Power Apps before the deadline?
If you need help modernizing your custom list forms, consider hiring a Power Apps consultant. IncWorx offers Power Apps Consulting Services as well as Pay-As-You-Go Consulting for smaller projects. Connect with us today!